apt -y update
apt -y install build-essential libboost-all-dev libssl-dev cmake git
获取项目文件并编译:
git clone https://github.com/xyanrch/overplus.git
cd overplus && mkdir build && cd build
cmake ..
make
复制编译好的文件:
cp overplus /usr/local/bin/overplus
新建一个目录用于存放overplus的配置文件:
mkdir -p /usr/local/etc/overplus
新建overplus的配置文件:
nano /usr/local/etc/overplus/server.json
一个示例配置如下:
{
    "run_type": "server",
    "local_addr": "0.0.0.0",
    "local_port": "443",
    "allowed_passwords": [
        "password"
    ],
    "log_level": "NOTICE",
    "log_dir":"",
    "ssl": {
        "cert": "/etc/letsencrypt/live/overplus.example.com/fullchain.pem",
        "key": "/etc/letsencrypt/live/overplus.example.com/privkey.pem"
    }
}
注:如果你的服务器443端口被占用了,在这里你也可以选择用其他的端口,例如8443。
接下来需要申请一个ssl证书,这里我使用certbot+nginx来完成,首先安装一下相关的包:
apt -y install nginx python3-certbot-nginx
新建一个nginx站点配置文件:
nano /etc/nginx/conf.d/overplus.conf
写入如下配置:
server {
        listen 80;
        server_name overplus.example.com;
}
接下来就可以使用certbot申请ssl证书了:
certbot certonly --nginx
你申请好的证书和私钥的路径应该就是之前server.json里面配置的路径:
/etc/letsencrypt/live/overplus.example.com/fullchain.pem
/etc/letsencrypt/live/overplus.example.com/privkey.pem
你只需将overplus.example.com这个域名替换成你自己的域名即可。
接下来新建一个systemd服务:
nano /etc/systemd/system/overplus.service
写入如下配置:
[Unit]
Description=overplus - An proxy tool helps you bypass GFW
After=network.target

[Service]
ExecStart=/usr/local/bin/overplus /usr/local/etc/overplus/server.json
Restart=on-failure
RestartSec=10s
LimitNOFILE=infinity

[Install]
WantedBy=multi-user.target
启动overplus并设置开机自启:
systemctl enable --now overplus
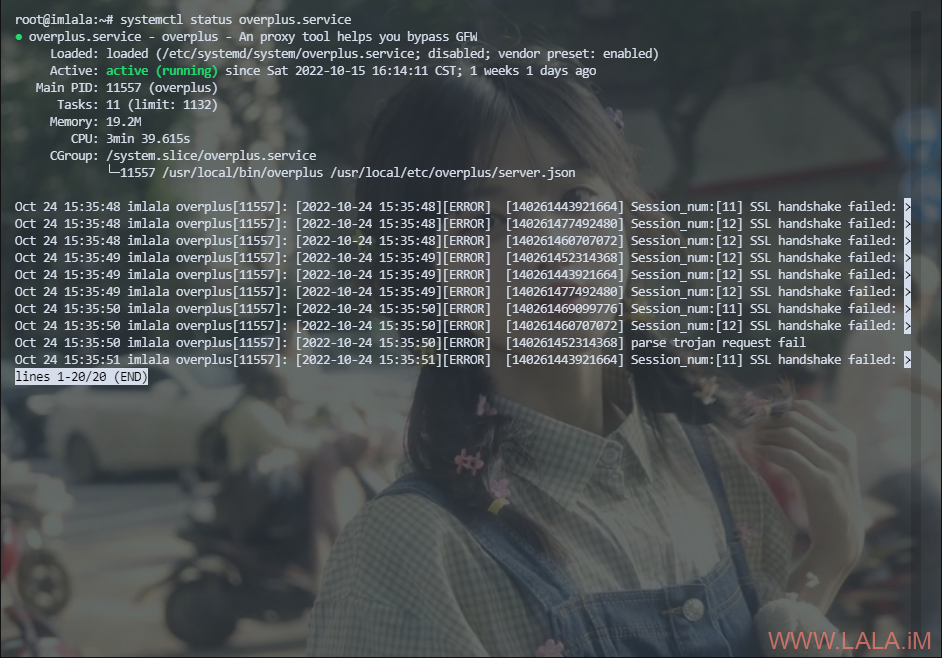
检查运行状态:
systemctl status overplus
只需要确保正在运行即可,日志里面可能有很多关于TLS握手的错误信息直接忽略掉即可,这个不影响正常使用:

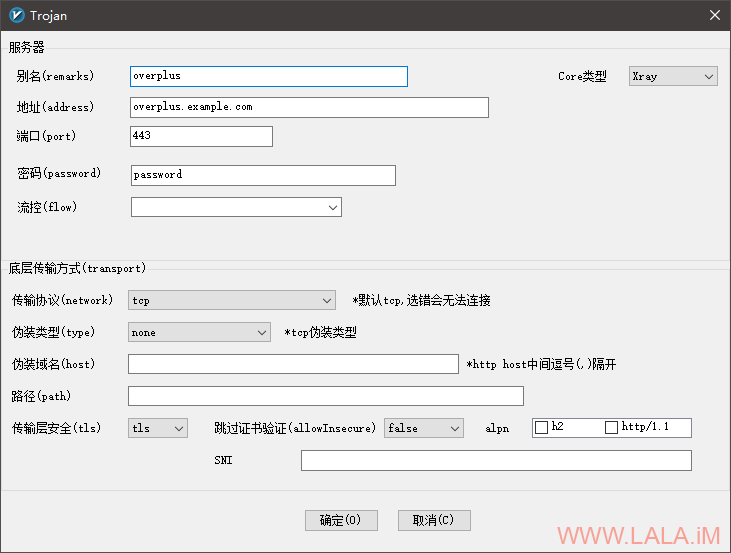
客户端可以使用overplus或者其他的软件,这里截一个v2rayn的配置图供参考:

原文:https://lala.im/8504.html


